
Get Started
- Need to download and install AirDroid Personal onto both your computer and Android/iOS/Win/Mac device.
Part 1: Connect Device to PC
In order to use AirDroid Personal for remotely controlling the devices, wireless transferring and managing files, etc., you need to set up your Android devices and connect to your laptop/PC. AirDroid Personal offers you 2 ways to connect your android phone to a computer.
Connection
- Local Connection Mode:The mobile phone and the computer are connected to the same Wi-Fi, the connection status will show that your devices are connected in LAN Connection Mode.
- Remote Connection Mode:The mobile phone and the computer are connected to a different network, and the controlled device is connected to Cellular(Mobile data) or wifi.
Local Connection Mode
To connect your device to your PC in Local Connection Mode, make sure both your mobile device and PC are connected to the same Wifi. And then simply create an AirDroid account and sign in with the same AirDroid account on both Android devices and PC.
Remote Connection Mode
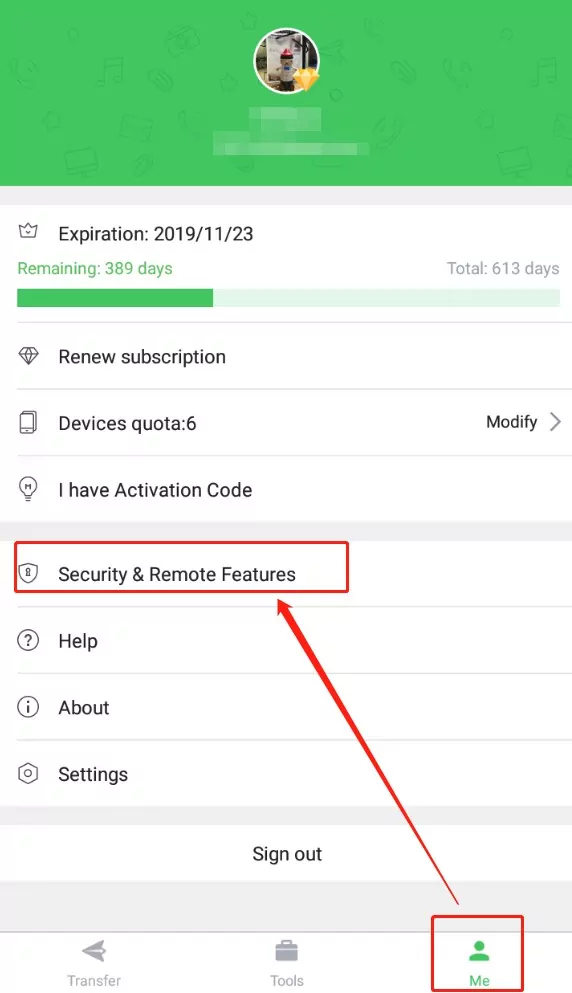
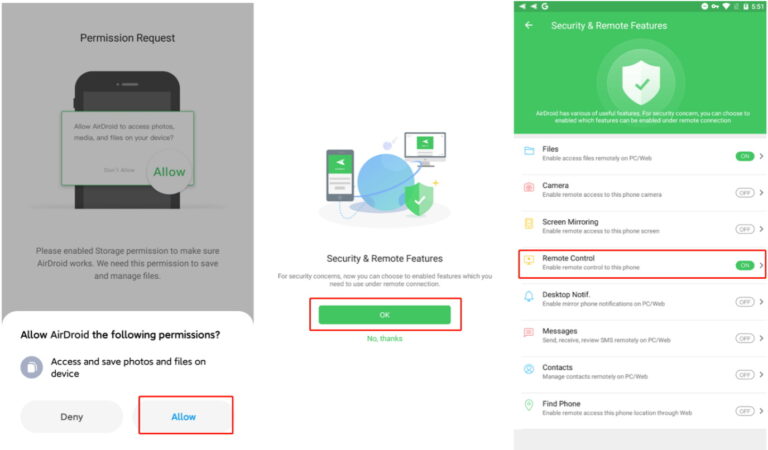
If your device and PC are not connected to the same network, you should set up your android device and enable the remote features first. Below are the detailed steps on how to connect your Android devices to a PC in Remote Connection Mode: Step 1: After sign in the same AirDroid account, open AirDroid Personal App on your phone, go Me > Security & Remote Features.
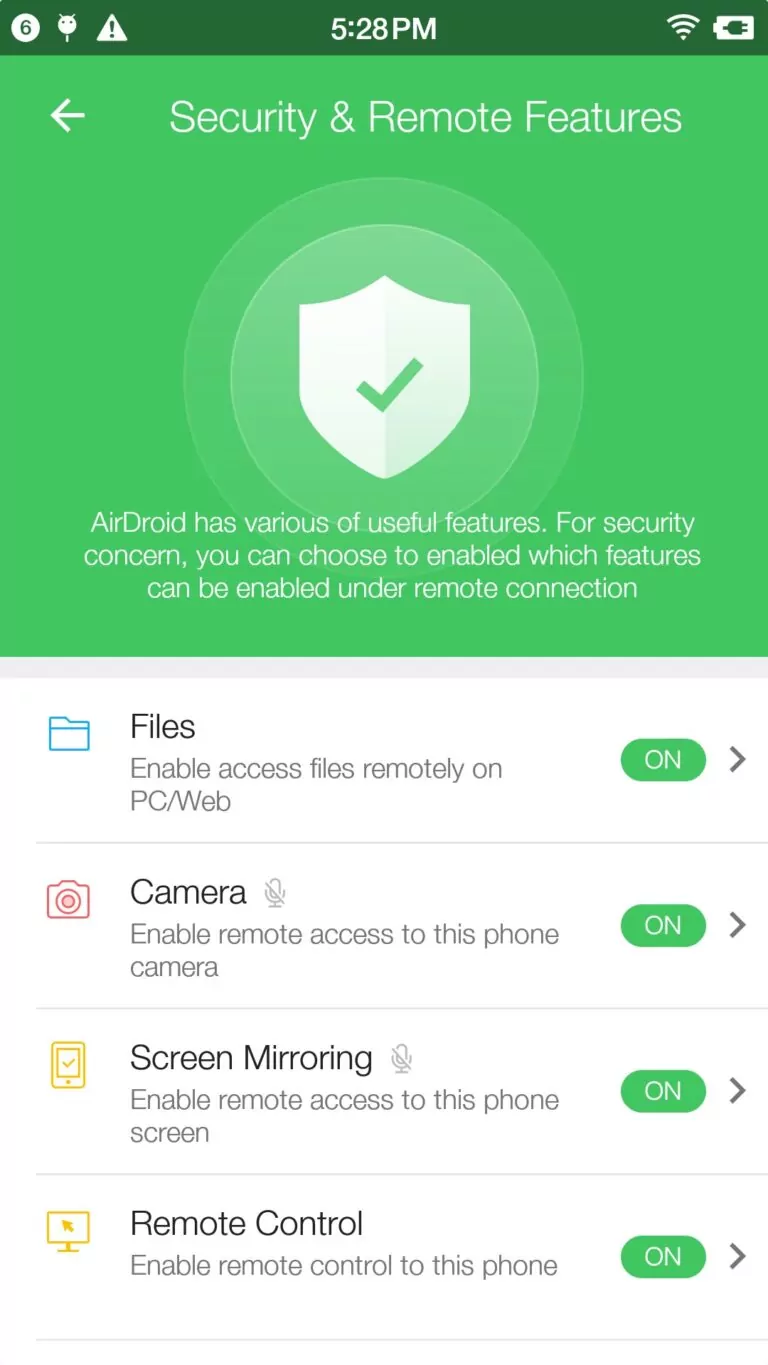
Step 2: Switch on as many features as you need or all of them to link them on both your devices.
Now that you have set up the application on both your devices, iat is time to explore and use its features.
Part 2: File Transferring
AirDroid Personal allows users to transfer files across multiple platforms which bodes well with its popularity as a top 1 tool to transfer files. What's best is its ability to share data with friends via the nearby and remote transfer feature without limitations of a format. Below you will find the detailed steps you can follow:
How to Wireless Transfer Files from PC?
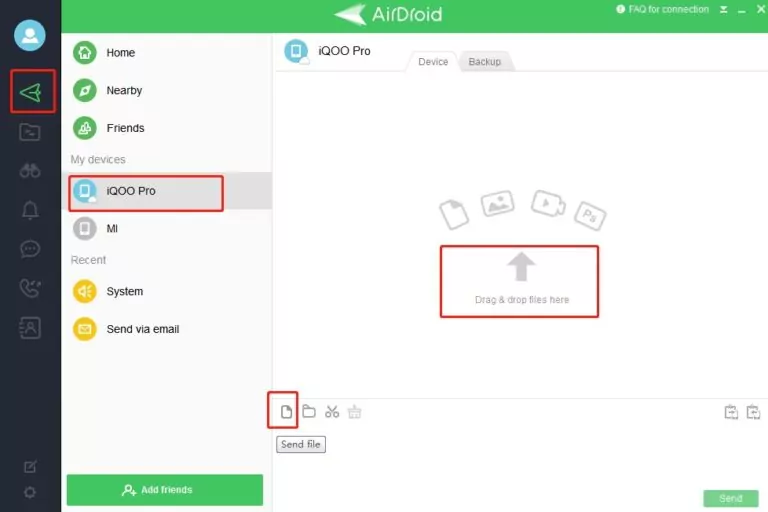
From the left menu bar, click on your connected device under My Devices. You can drag & drop the required files from your PC. It will be uploaded to your device in no time.
How to Wireless Transfer Files from Mobile?
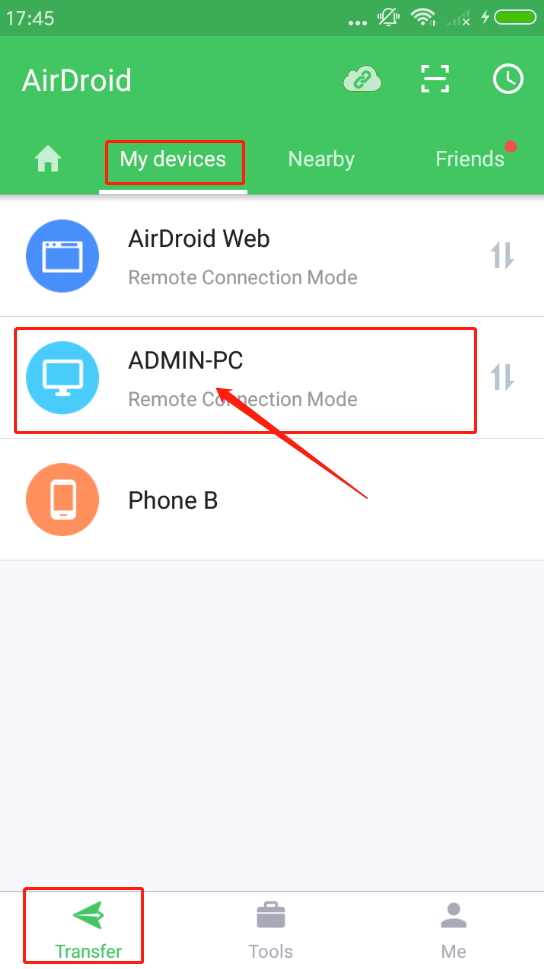
Step 1: Click on the Transfer button on your mobile phone. And select the device from the My Devices list.
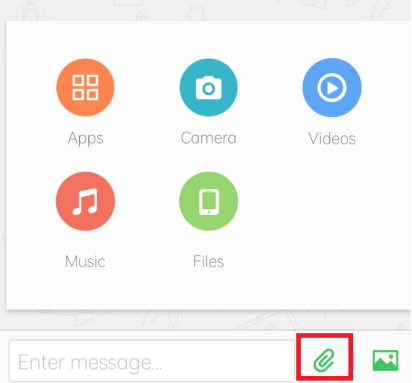
Step 2: Click on the attachment icon to select your desired location from where you want to transfer the files. If you want to transfer images, click on the picture icon right beside the attachment icon.
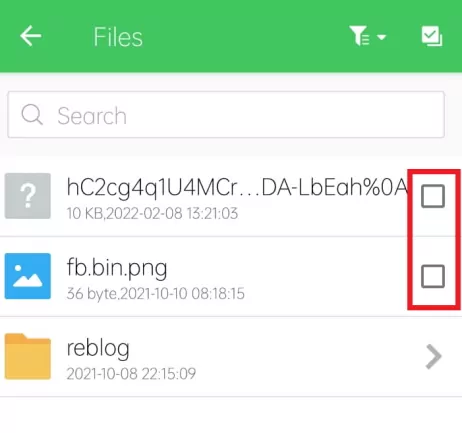
Step 3: Check the box beside the file(s) to transfer them to your laptop. You can select all the files together by clicking on the checkbox at the top right corner. You can also sort the files by clicking on the icon shown below. After selecting the file(s), click on the Send button. It will immediately be transferred to your laptop.
AirDroid Personal Nearby Share
AirDroid Personal makes transferring files seamless with the nearby search feature. It allows you to discover nearby devices quickly and establish a connection with them to chat and share files, just fast and easy like AirDrop.
Searching nearby devices on your mobile
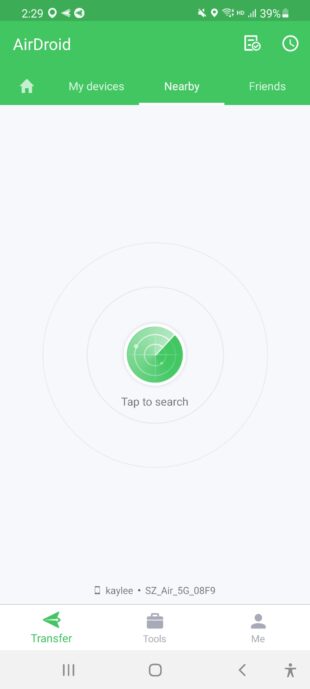
Step 1: On your AirDroid Personal App, go to the Nearby tab. Click on the Tap to search button in the middle of the screen.
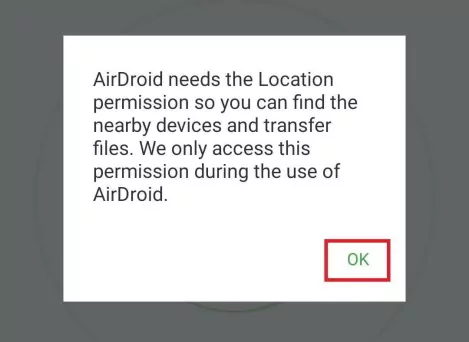
Step 2: Enable location permission on the application.
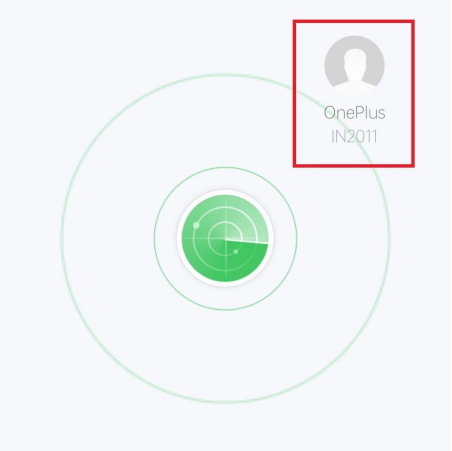
Step 3: The nearby device will appear on your screen. Click on the device, and repeat the same process of transferring files from one device to another.
Searching nearby devices on your laptop/PC
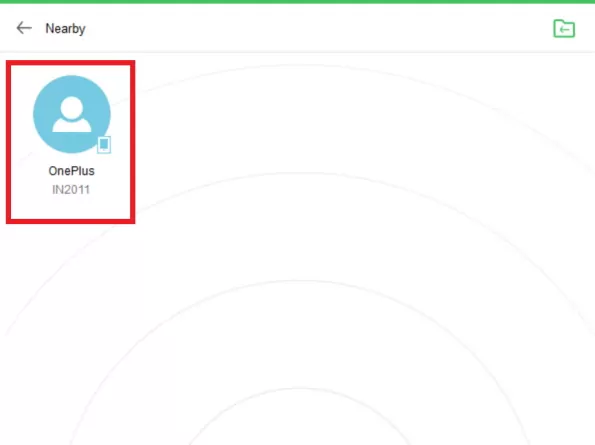
Step 1: On your AirDroid Personal App, go to the Nearby tab from the left menu bar. Click on the Search button.The application will search for nearby devices.
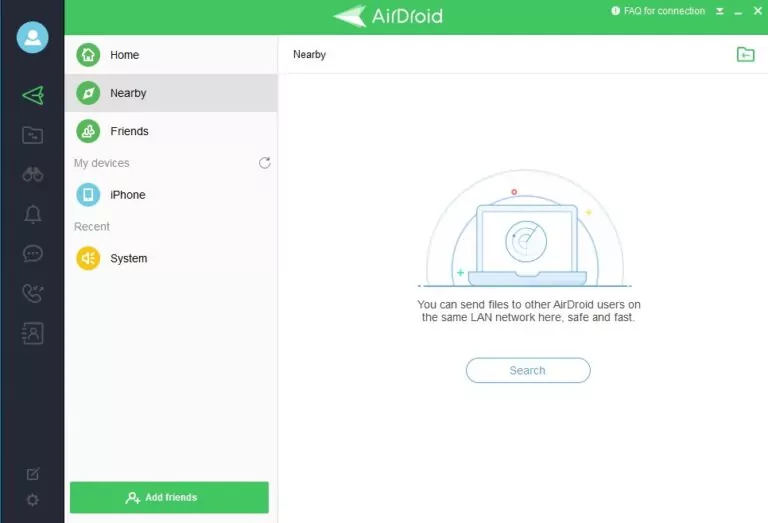
Step 2: You can find available devices on the screen in 2-3 seconds. Click on the device and repeat the same file transfer steps to proceed.
Part 3: Manage & Backup Files
Not only securely transferring files, but AirDroid Personal has also made both management and backing up files more convenient than ever before. Below you will find the detailed steps you can follow:
How to Manage Your Android Files on a PC?
Step 1: Launch your AirDroid Personal desktop application and connect your Android device to the PC. Click on the files button from the far left menu panel.
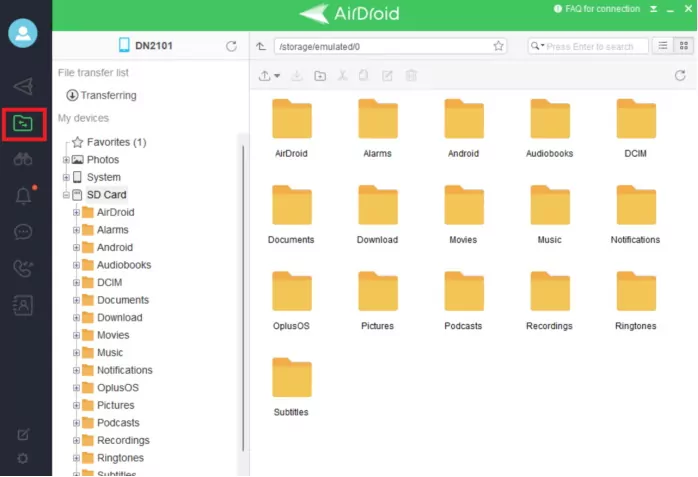
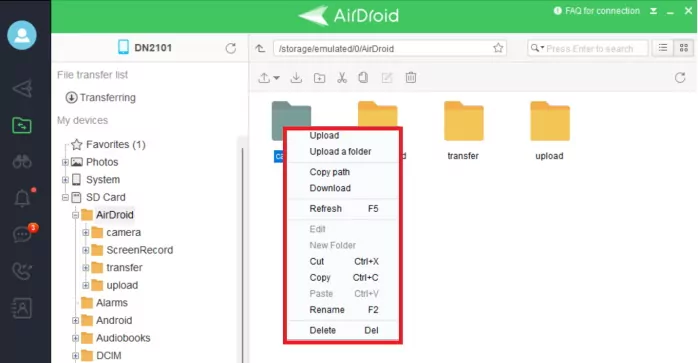
Step 2: You will be able to check your Android file on the interface. From here, you can easily upload, download, delete, search, and rename files, and also check file transferring progress. All you need to do is right-click on the desired file and click on the necessary operation.
How to Backup Your Android Files?
AirDroid Personal allows you to back up all your files, including photos and videos, easily on your Android device as well as PC via the local connection.
Backup files on your Android device
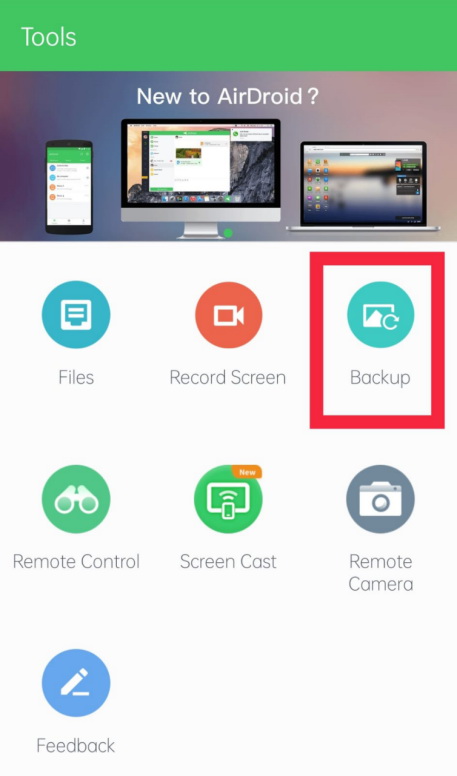
Step 1: Open the application on your phone, and click on the Tools button located below the screen. Click on the Backup button.
Step 2: On the following screen, click again on the Backup button, and choose the PC where you want to back up the files. Make sure that both your devices are connected to the same network.
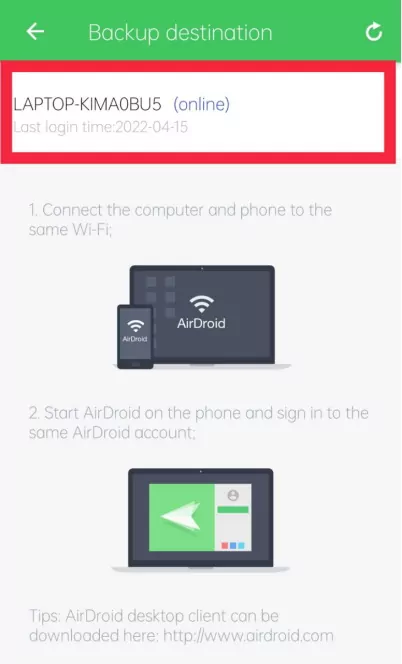
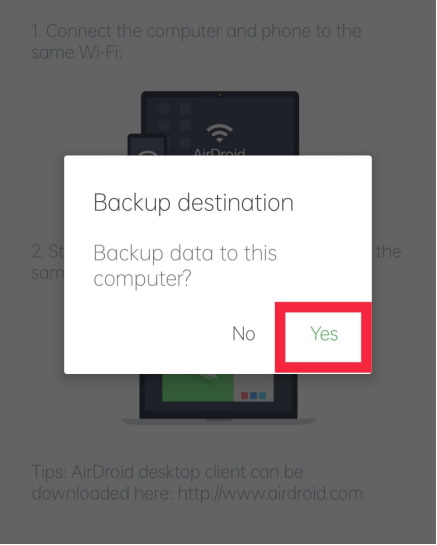
Step 3: Confirm your backup destination by clicking on the Yes button and your files will start backing up.
How to Backup Files on Your PC
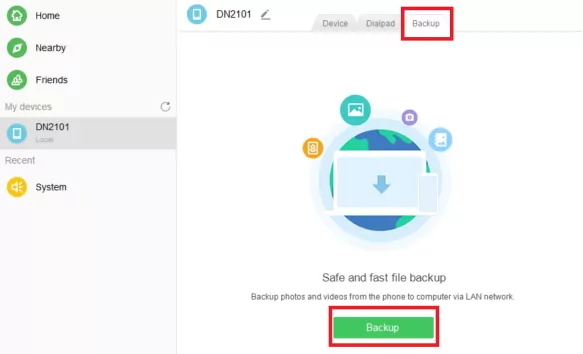
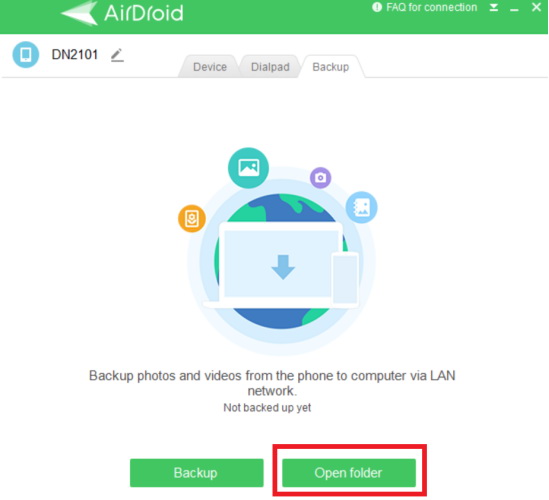
Step 1: From your device's interface on the PC, go to the Backup tab and click on the Backup button.
Step 2: Now, follow the given instructions to set Automatic backup on your phone and then click on the Done button.
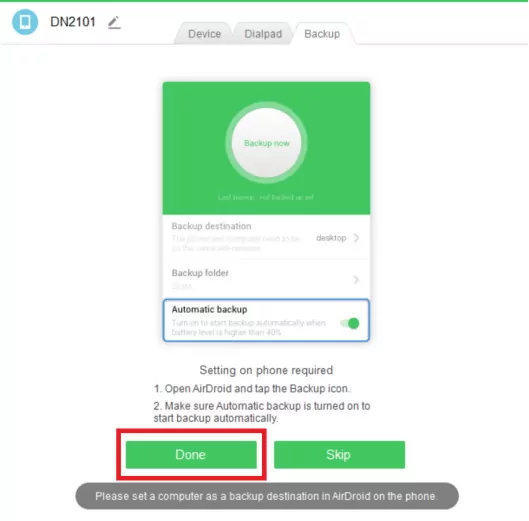
You can click on the Open folder button to check the files you have backed up.
Part 4: Remote Control
Below you will find the detailed steps you can follow:
How to Remote Control Your Android device from a PC?
Being able to remotely control your Android device from the PC will ease out a lot of your tasks. Even without rooting your phone, you can fully control your device. Step 1: Open your AirDroid Personal mobile application, and follow the instructions to enable Remote Control under Security & Remote Features.
Step 2: Once you enable remote control on your Android device, click on the Install button to download AirDroid Control Add-on. This add-on app will make sure that the services are seamless after you enable the accessibility permission, which doesn't require root or non-root authority for the device anymore. You can also download the AirDroid add-on from Google Play directly.
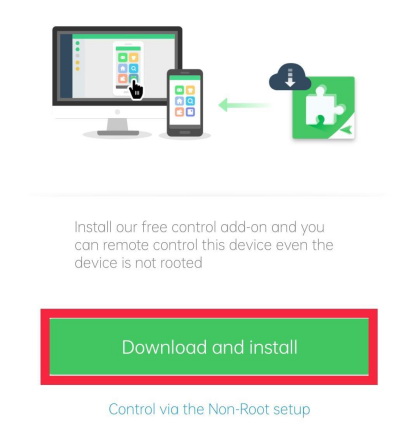
- AirDroid Control Add-on is available on Android 7.0 or above.
- You can also use the AirDroid Personal Desktop Client to run a Non-Root setup with USB cable, for more please check this article: How to run Non-Root setup to remote control Android Phone?
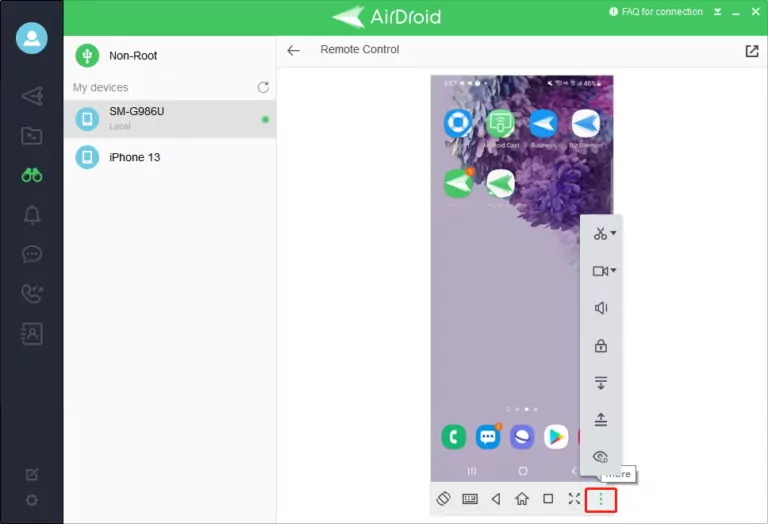
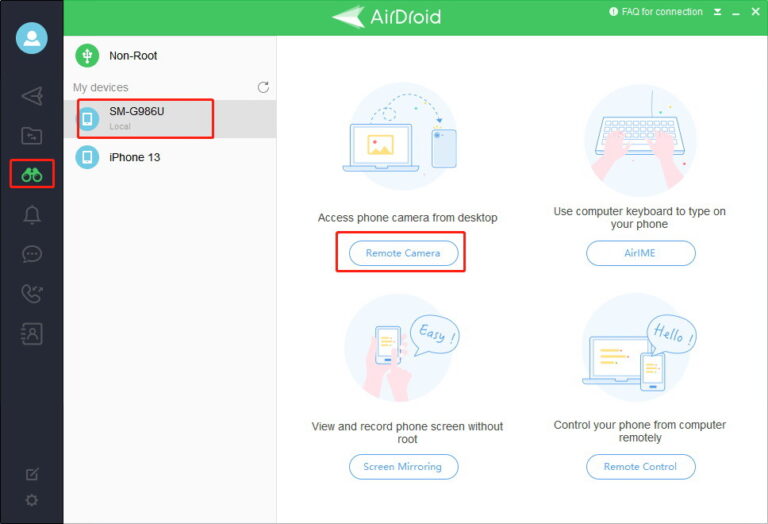
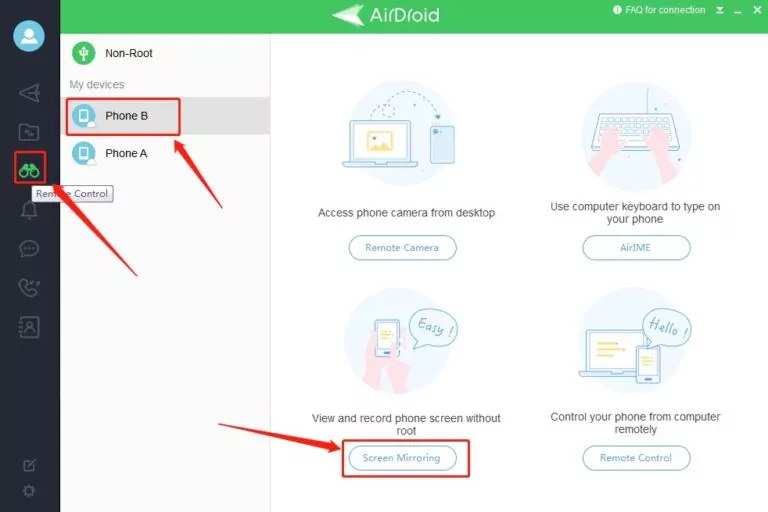
Step 3: Click on the Remote Control (telescope sign) button from the far left menu panel of your AirDroid Personal PC application. Then select the android device that you want to control remotely. Now, click on the Remote Control button to access your Phone.
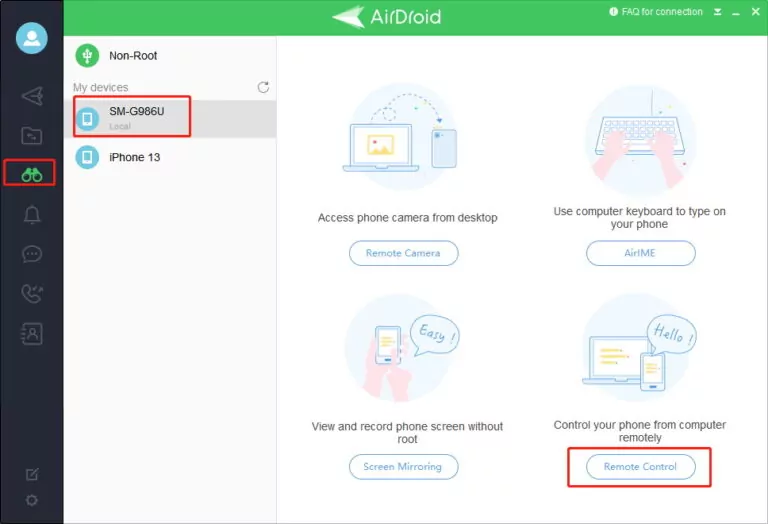
Step 4: Once the program is connected, it will display your Android screen on the PC and you can control all the functions with the mouse and keyboard.
How to Access Your Android Phone Camera from a PC?
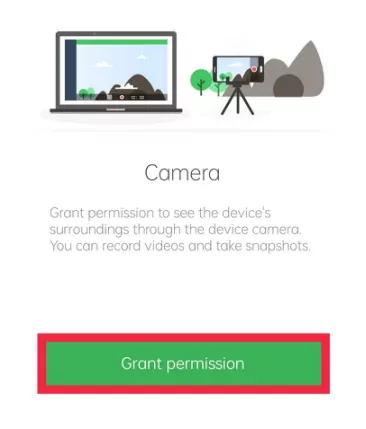
Using the camera is made more accessible with AirDroid Personal. Now, to use your phone's camera, you do not need the phone physically. Get full benefits of remote photography in real-time. The One-Way Audio feature of this application enables you to access the device's microphone and hear the ambient sound remotely. You can use this feature for safety purposes or to track how your baby is doing. Step 1: On your android, From the Security & Remote Features, turn on the Camera button on your AirDroid Personal mobile application. Click on the Grant permission button.
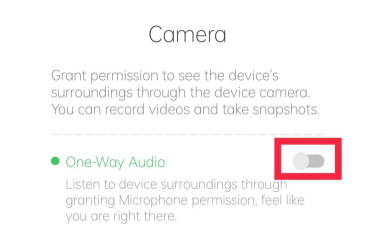
Step 2: Enable One-Way Audio by switching the option on.
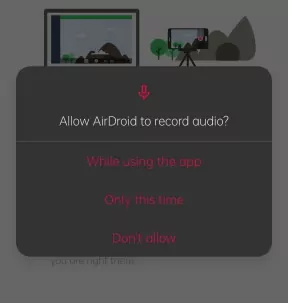
Allow AirDroid to record audio by selecting the relevant button.
Step 3: Now, click on the Remote Camera button from the Remote Control feature of your AirDroid Personal PC application. Remember to select the device that you want to remotely control.
- The AirDroid Personal app should run in the background on your phone for the feature to be used.
- One-Way Audio is available only for Premium users.
How to Use a Remote Keyboard (AirIME)?
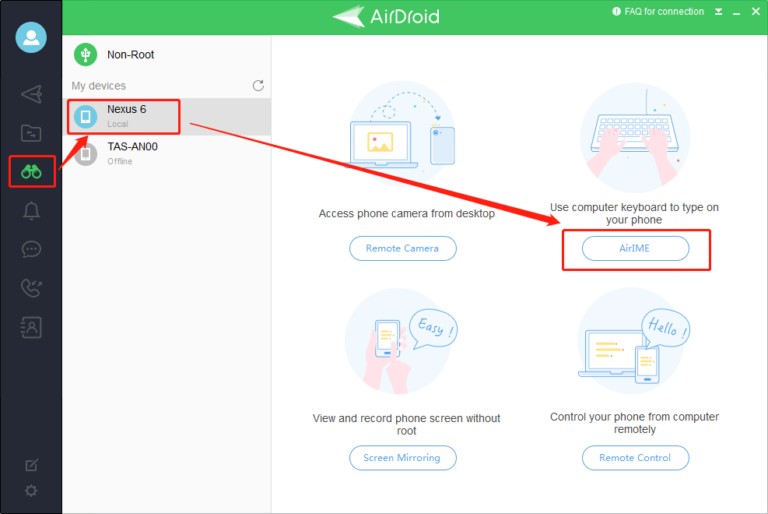
The Remote Keyboard feature of AirDroid Personal allows you to type on your phone with the help of the desktop keyboard. Step 1: From the Remote Control feature on your PC application, click on the AirIME button. Make sure the relevant device is selected too.
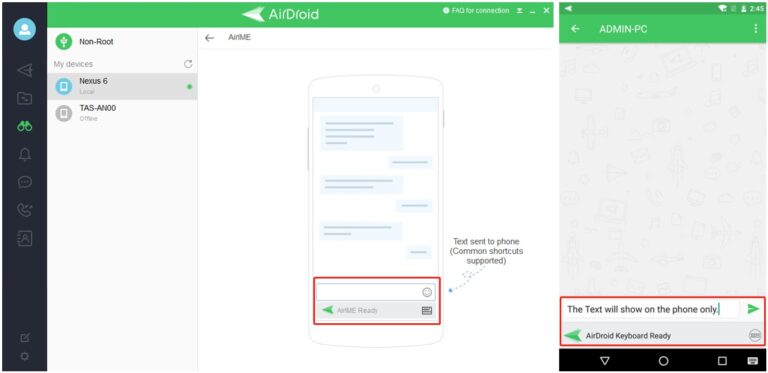
Step 2: Once connected, you will see a message, saying "AirDroid keyboard Ready." Click on the textbox and you can start using the computer's keyboard to type on your phone.
How to Remote Access Android Phone from Another Phone?
Follow the bellow steps if you want to remotely access the Android from another Android:
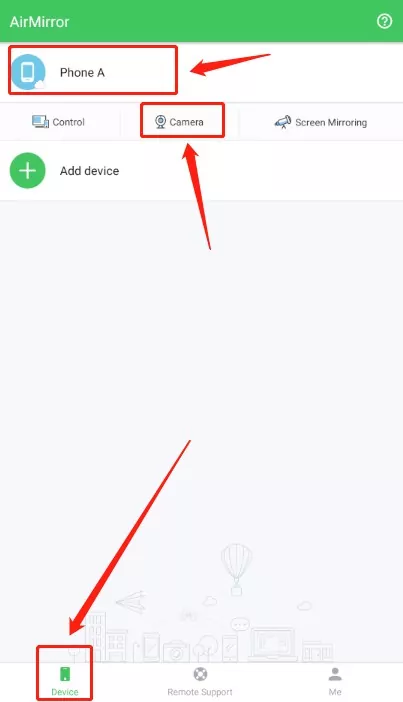
- Step 1: Download and install the AirDroid Personal app on the phone you want to control(controlled end). Install the AirMirror app on the phone as controller end, and sign in to the same AirDroid account.
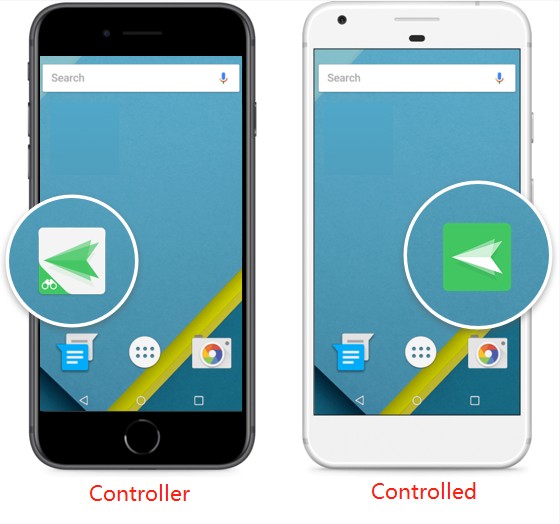
- Step 2: On AirMirror app, go to Devices and select your phone that needs to be controlled. Then, Choose to click Control / Camera / Screen Mirroring as you need and wait until the connection is established. Now, you can remotely access the Android phone.
Part 5: Screen Mirror
How to Mirror Your Android Phone Screen from the PC?
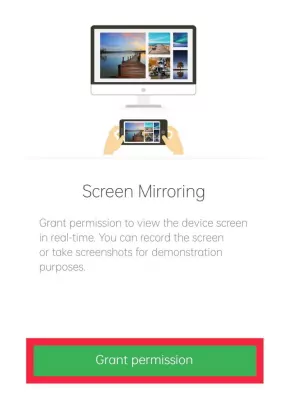
The benefits of screen mirroring are undeniable. AirDroid Personal makes it secure and hassle-free. Step 1: From the Security & Remote Features on your mobile application, click on the Grant permission button on your Android screen.
Step 2: After entering the Remote Control module from your PC application, click on the Screen Mirroring button to establish a connection.
Part 6: Other Features of AirDroid Personal
Below you will find the detailed steps you can follow:
Screen Record
You can easily record your Android screen from the AirDroid Personal application while being in remote control mode.
How to Screen Record on Your Android Phone?
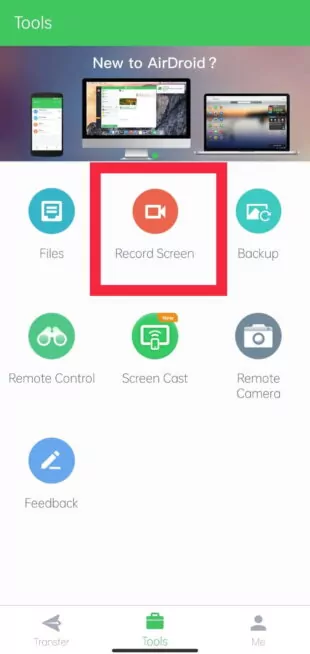
Step 1: On your AirDroid Personal mobile application, click on the Record Screen button under the Tools section.
Step 2: A small panel will be created on your Android home screen. Click on the camera icon from the panel to start recording. To stop the recording, click on that same icon.

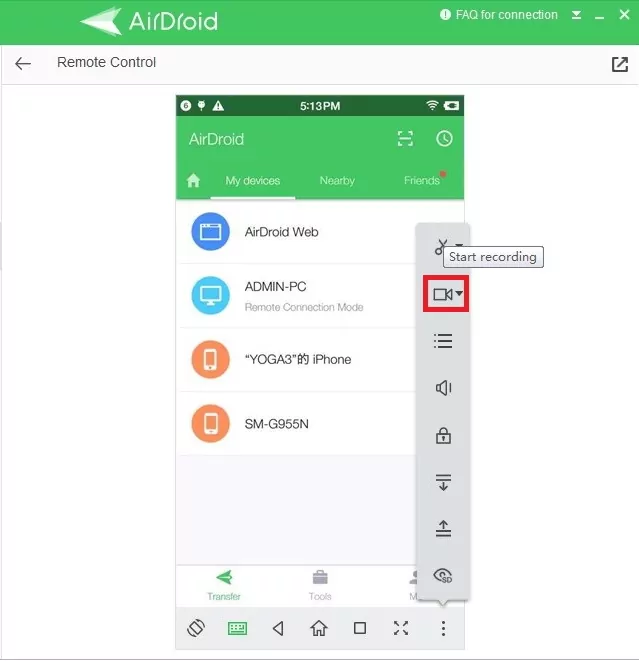
How to Screen Record Your Android Phone on the PC?
Once the remote connection is established with your Android phone, click on the camera icon to start recording. Tap on the same button to stop recording.
SMS & Notifications
How to Receive and Send Phone SMS & Notifications on Your PC?
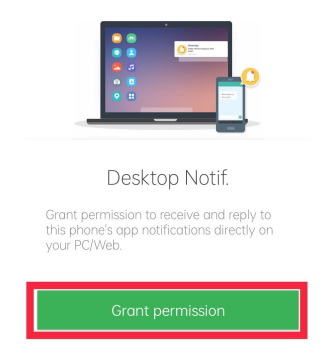
Even if your Android device is not physically present with you, you can make sure not to miss a single notification from the next time onwards. Starting from syncing texts to making phone calls, AirDroid Personal makes everything seamless. Step 1: Click on the Grant permission button to allow receiving mobile notifications on your laptop/PC under Me > Security & Remote Features > Desktop Notif. from your mobile application.
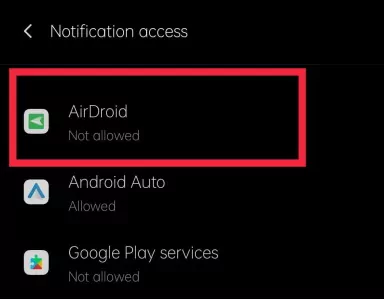
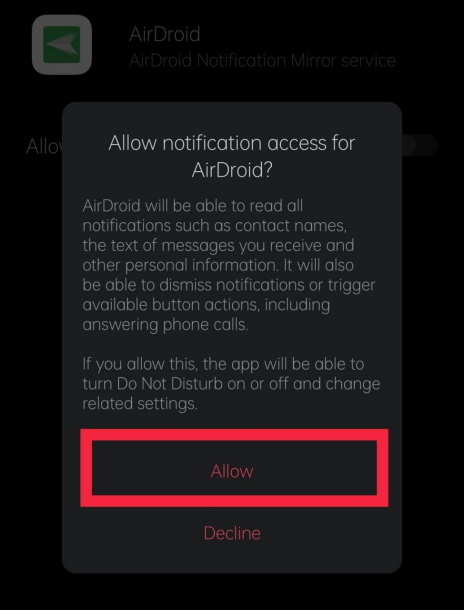
You will be redirected to the Notification access screen. Click on the AirDroid button.
Step 2. Switch on the Allow notification access button.
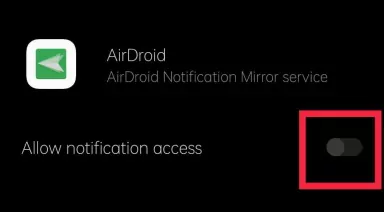
Another window will pop up confirming the permission. Click on the Allow button, and you will be all set to receive notifications on your desktop.
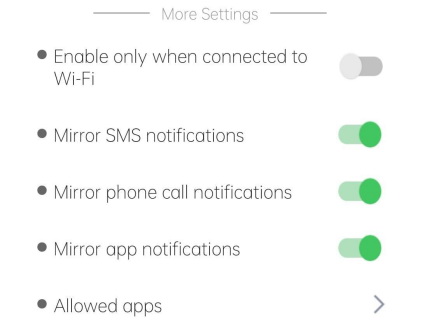
Step 3: You can now customise the options as needed. If you receive a notification on your PC, then be sure that desktop notification has been enabled.
- Make sure your device is running Android OS 4.0+, and you can receive the related notification on your phone first.
- If you want to customize the notifications that you want to be displayed on your computer, please check How to disable or block app's notifications mirror to your computer?
Dial Pad
How to Enable the Dial Pad Feature on Your PC?
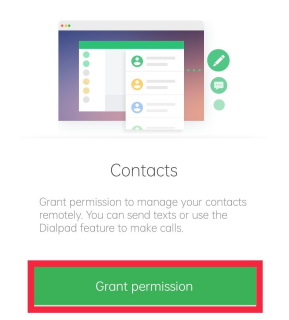
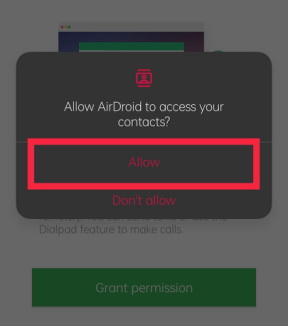
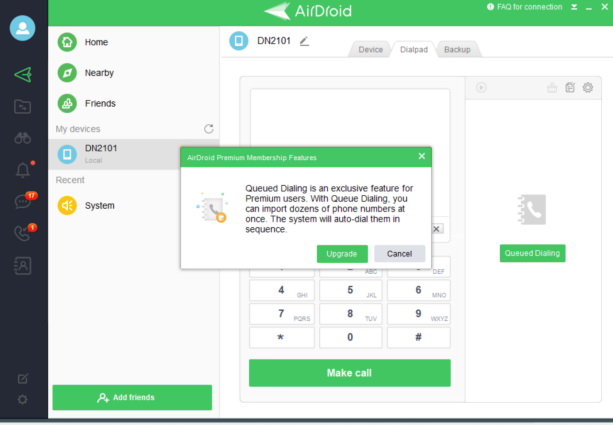
The AirDroid Dialpad feature allows you to dial any phone number and place calls from the PC only. Additionally, with the Queued Dialing function, you can import dozens of phone numbers, and the system will help auto-dial the phone numbers in sequence. It brings the convenience of making bulk calls and helps you stay productive on your PC. Step 1: On your Android device, launch the AirDroid Personal application. Under Me> Security & Remote Features > Contacts., click on the Contacts button to Grant permission button to manage your contacts remotely.
Step 2: Click on the Allow button to let AirDroid Personal access your call logs.
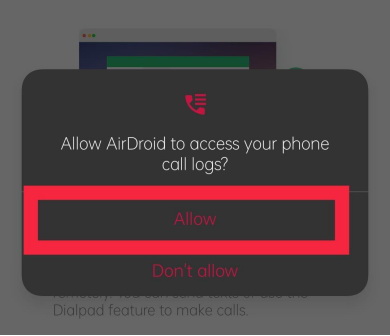
Click on the Allow button to let AirDroid Personal access your contacts.
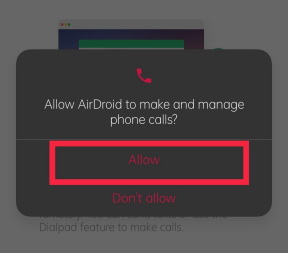
Click on the Allow button to let AirDroid Personal manage phone calls.
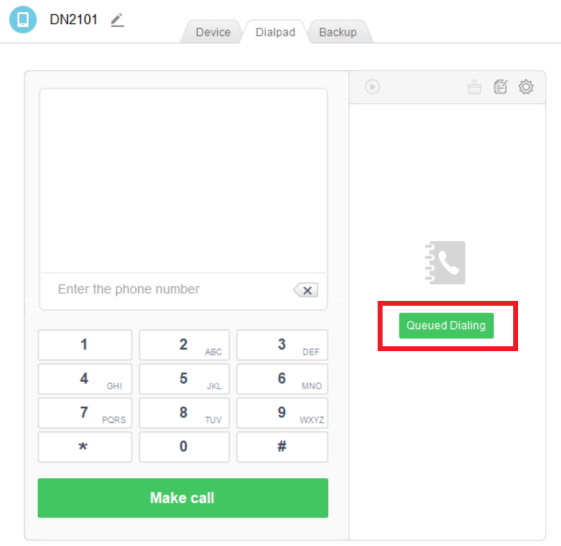
Step 3: Now, open your AirDroid Personal PC app, and click on the File Transfer icon from the far left menu panel. Select the connected device, and click on Dialpad from the top of the program. Enter the relevant phone number, and click on the Make call button to initiate the call.

- With AirDroid Personal, though you can initiate or end a call, you would still need to have your phone to speak and listen. Due to some technical restraints, AirDroid Personal doesn't support using the PC mic while making calls yet!
- If you want to use different networks to connect both your devices, you need to upgrade to a premium membership.
How to Use Queued Dialing on the Dialpad feature?
With Queue Dialing, you can import dozens of phone numbers at once. The system will auto-dial them in sequence. Step 1: Click on the Queued Dialing button, and follow the next instructions affirmatively. Put the contact information, and click on the OK button to start queued dialing.
Step 2: Once the process is complete, you will be able to see the phone numbers listed on the right of the dial pad.
Part 7: FAQs
- Lite Mode: Visit the IP address displayed in your AirDroid app, something like http://192.168.xx.xx:8888.
- Using QR code: Open web.airdroid.com > go to AirDroid on your Android device > press the Scan QR Code button at the bottom > point your Android device's camera at the QR code to scan it. This QR code process has been explained in the Remote Connection part under the Connection section at the beginning of this guide.
